
Mastering Resin River Tables with Collin Culdice: A Journey in Craftsmanship
At Blue Snow Inc., we specialize in crafting custom furniture for clients across the United States. Our founder, Collin Culdice, is passionate about creating unique, high-quality pieces, and one of the most exciting projects we take on is building resin river tables. In this blog, we share Collin’s expert tips on creating these tables, drawn from over a decade of experience in woodworking.
Overcoming Challenges in Resin River Tables
Building a resin river table is no small feat. Collin has faced numerous challenges over the years, from managing mold releases to dealing with resin bubbles. For those of you trying to create your own, Collin offers this key advice: using a silicone mold instead of traditional materials like MDF or plywood can save you time and resources. Silicone molds allow for multiple pours without breaking, unlike cheaper options that only last a couple of pours.
Why Silicone Molds Matter
Collin emphasizes that investing in silicone molds, though a bit pricier upfront, pays off in the long run. With silicone, you can avoid constantly replacing your molds, leading to a more efficient process. At Blue Snow Inc., we’ve perfected this technique, allowing us to focus more on the artistry of each piece rather than the frustration of broken molds.
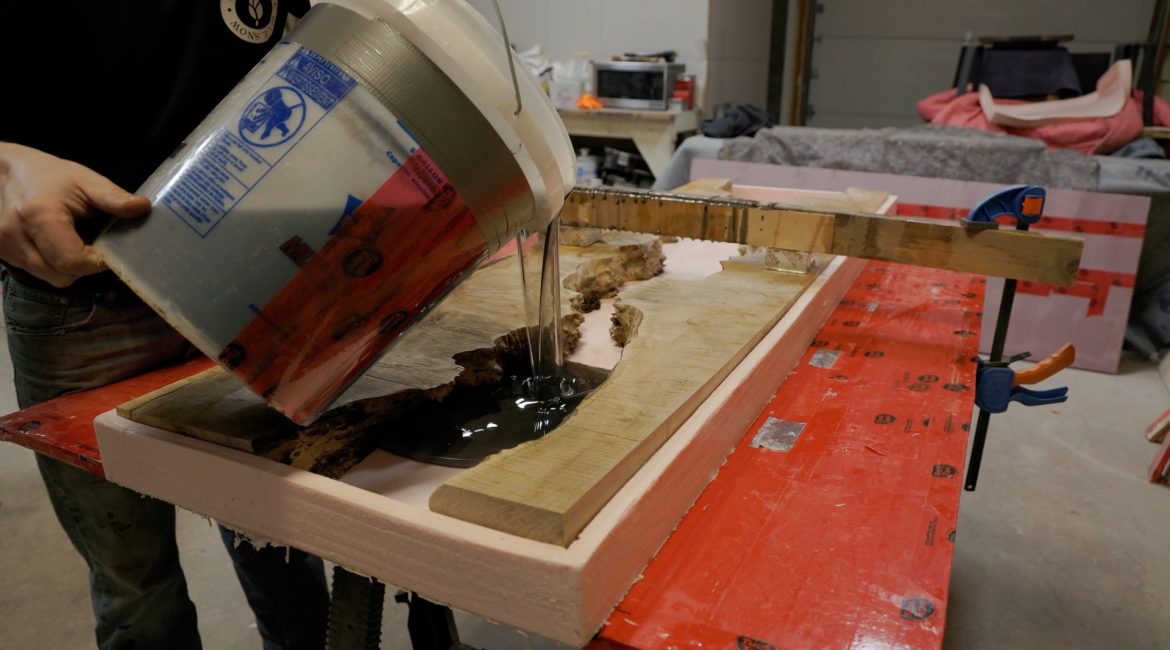
Attention to Detail: Mixing and Pouring Resin
Another vital part of the process is proper resin mixing. Collin explains how crucial it is to thoroughly mix the resin to avoid gooey spots that won’t cure correctly. Warming the resin slightly before mixing can help reduce bubbles, and using a black dye from Sherwin-Williams ensures a beautiful contrast against the wood.
Once the resin is poured, it’s important to level it off and monitor for bubbles, especially around the live edges of the wood. Collin’s expert tip: hit the resin with a little heat before pouring to prevent pesky bubbles from forming.
Finishing the Piece
After the resin has cured, removing the table from the mold is easy and mess-free, thanks to the silicone form. Collin recommends sanding the surface with progressively finer grit to achieve a smooth finish—starting from 80 grit and going up to 600 grit. Double-check for any missed bubbles or imperfections during the sanding process to ensure the best result.
Final Touches and Creative Uses for Remnants
Collin wraps up the process by adding finishing touches with a water-based finish, avoiding potential issues with oil-based finishes reacting with the resin. In fact, some of the smaller remnants from resin pours make perfect picture frames or coasters, adding even more value to the process.
At Blue Snow Inc., we take pride in making beautiful, functional furniture that will last a lifetime. Whether you’re interested in custom pieces for your home or learning about the craft of resin river tables, we’re here to help. Contact us today to start your custom furniture journey!